
In practice, fitting the Pitch-Key takes only seconds but it is best to do this as shown in the following instruction steps:-
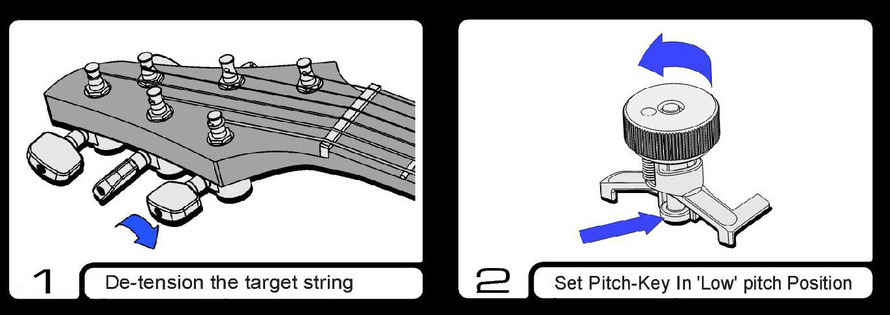
It is important to de-tension the target string as this will make fitting the Pitch-Key easier and will avoid stress to the string. Tune down by a couple of turns to make the string quite pliable.
Set the Pitch-Key in the 'Low' position by rotating the thumb- wheel fully counter-clockwise at which point the piston should drop fully downwards, ready to accept the string.

The stabilizer legs go on either side of the adjacent string so that the Pitch-Key stays in position. The stabilizer legs should fit loosely over the adjacent string and should not grip onto it.
The lower flange of the piston should be hooked under the target string - also make sure that the outer lug (closest to the nut) is sitting over the target string and that the
stabilizer legs are still in place.

Lift the outer lug over the target string so that the Pitch-Key is attached securely on that string. Position the Pitch-Key so that it does not touch any part of the nut, headstock, or tuning post.
The lower of the two pitches is set by using the guitar's tuning post. For example, if you are using a Drop D tuning, then tune to a 'D' with the guitar's tuning post as shown.

Rotate the thumb-wheel clockwise nearly one full turn until it comes to a stop - this is the 'High' pitch where the string is tensioned to an extent set by the fine-tuning screw.
Fine-tune the 'High' pitch using the 1.5mm hex key. In this example, we would fine-tune to a standard 'E'. Now alternate between the 'High' and 'Low' pitch positions several times and readjust if
necessary.

Full demo by master musician and gear expert - Andy Ferreira
Review and amazing real time transposing demo - NeoGeoFanatic